Are you tired of scrubbing grease and food splatters off your kitchen walls? Want to add a touch of personality to your cooking space? Look no further than a backsplash behind your stove. This practical yet stylish addition not only protects your walls but also adds visual interest to your kitchen design. But with so many options available, it can be overwhelming to decide where exactly to stop the backsplash behind your stove. Don’t worry, we’ve got you covered.
The most ideal location for a backsplash is directly behind the cooking surface. This ensures that any messes are contained and easily wiped off, keeping your walls pristine. Plus, it creates a focal point in your kitchen, drawing attention to the heart of the room – the cooking area.
When it comes to height, experts recommend extending the backsplash at least 18 inches above the stovetop for maximum protection and impact. However, if you have limited space or prefer a more minimalist look, a shorter backsplash can still do wonders in adding style and function.
Now onto materials – durability and ease of cleaning are key considerations here. Ceramic or porcelain tiles are popular choices for their durability and endless design possibilities. Stainless steel offers a sleek and modern look while being easy to clean. And for those who want something truly unique, glass can add an unexpected pop of color and texture.
By following these tips and considering your personal style and needs, you can create an attention-grabbing and functional backsplash that will elevate your kitchen design. So go ahead, get creative with where you stop the backsplash behind your stove.
Contents
- 1 Determining the Height of the Backsplash
- 2 Where To Stop Backsplash Behind Stove?
- 3 Materials for Backsplash
- 4 Design Options for Backsplash
- 5 Installation Process
- 6 Maintenance and Cleaning
- 6.1 Step 1: Gather Your Supplies
- 6.2 Step 2: Prepare the Area
- 6.3 Step 3: Remove Grease and Grime
- 6.4 Step 4: Wipe Down with a Microfiber Cloth
- 6.5 Step 5: Rinse with Water
- 6.6 Step 6: Dry the Area
- 6.7 Step 7: Clean Grout Lines
- 6.8 Step 8: Remove Tough Stains
- 6.9 Step 9: Wipe Down with Vinegar
- 6.10 Step 10: Rinse with Water
- 6.11 Step 11: Dry the Area
- 6.12 Step 12: Seal the Backsplash
- 7 Conclusion
Determining the Height of the Backsplash
Determining the height of the backsplash behind your stove requires careful consideration of both functionality and design. Typically, experts suggest a height of 8 to 14 inches for a stove backsplash, with a minimum of 8 inches above the stovetop. However, this may vary depending on the clearance requirements of your stove and personal design preferences.
To determine the best height for your backsplash, follow these steps:
- Check your stove manual: Before finalizing the height of your backsplash, refer to your stove’s manual for any clearance requirements. This will ensure that the backsplash does not interfere with the safe operation of your stove.
- Measure from the countertop: The backsplash should ideally be at least 4 inches above the counter or cooktop for basic protection. However, extending it higher can provide better coverage and create a cohesive look by matching it with surrounding surfaces.
- Consider sightlines: When deciding on the height of your backsplash, keep in mind the sightlines from your cooking space. You want to avoid any awkward or disjointed looks between the backsplash and wall.
- Plan for tile layouts: If you plan on using tiles for your backsplash, thorough planning is crucial to achieve a seamless design. This may include wrapping tiles around corners, using border or trim tiles along edges, and creating templates for cutting tiles.
- Incorporate design elements: To create a cohesive look in your kitchen, consider incorporating design elements such as shelves or open shelving behind the stove. This will also help determine where to end your backsplash.
- Choose heat-resistant materials: When installing a backsplash behind a stove, it is essential to select materials that can withstand heat and moisture. Some recommended options include metal, glass, stone, ceramic tile, concrete, and fireproof backer boards.
By following these steps and considering factors such as clearance requirements, aesthetics, and integration with surrounding surfaces, you can determine the perfect height for your backsplash behind your stove.
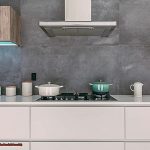
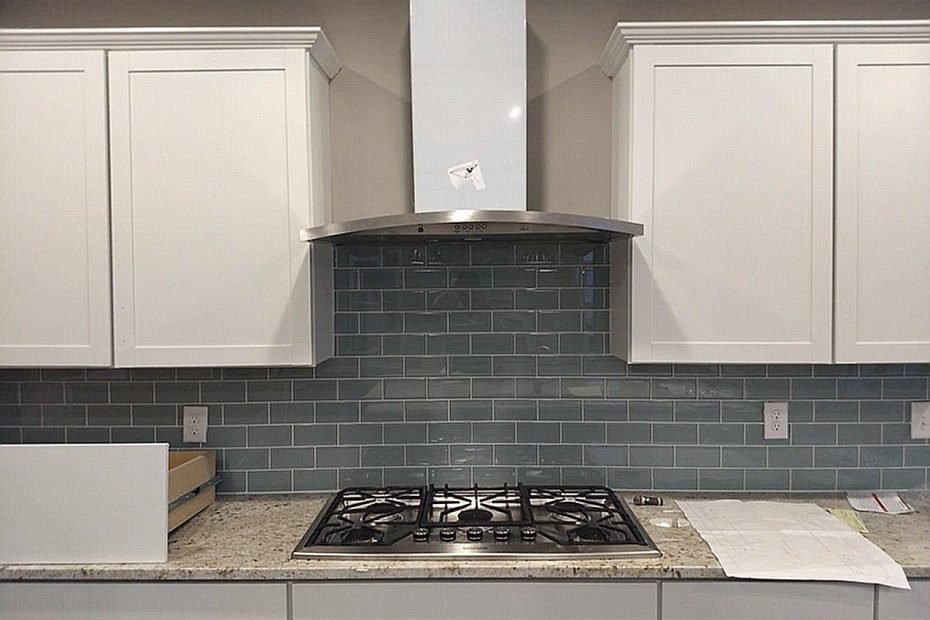
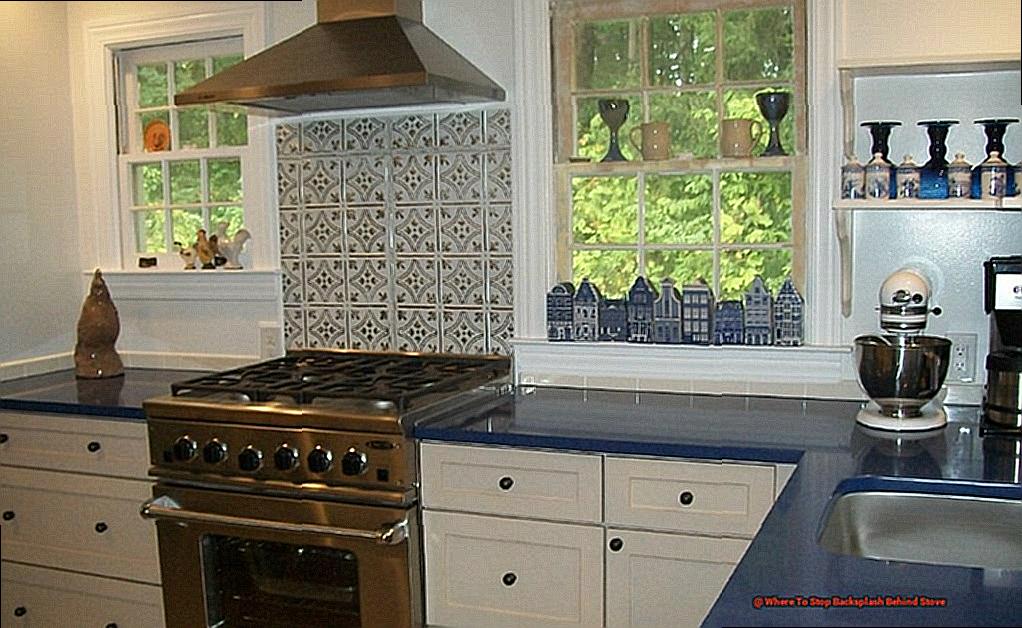
Where To Stop Backsplash Behind Stove?
When considering where to stop the backsplash behind a stove, there are multiple factors to keep in mind for both functionality and aesthetics. Below are some key points to consider:
- Protection: The primary purpose of a stove backsplash is to shield the wall from grease splatters, steam, and heat. To guarantee optimal protection, most experts recommend extending the backsplash 18-24 inches behind the stove.
- Clearance requirements: It is important to review your stove manual for clearance requirements and building codes when deciding where to end your backsplash. This will ensure safety and compliance with regulations.
- Design elements: Take into account other design elements in your kitchen when determining the stopping point for your backsplash. These could include windows, full-height backsplashes, range hoods, or other features that may impact the overall look and function of your kitchen.
- Cohesiveness: For a cohesive appearance, it is best to extend the stove’s backsplash to the same height as surrounding backsplashes. This creates a smooth transition between different surfaces and finishes in your kitchen.
- Accessibility: Ensure that your backsplash does not block access to electrical outlets located behind the stove. If possible, plan for outlets to be placed above or below the backsplash instead of directly behind it.
- Stove configuration: Different configurations of stoves may require different stopping points for the backsplash. For example, a full-height backsplash may be appropriate for a standard stove, while a shelf or open shelving may work better for a larger or more unique stove.
- Material considerations: It is crucial to choose materials that can withstand heat and moisture when using them behind a stove. Options include metal, glass tile, stone, ceramic/porcelain tile, concrete backer boards, etc.
- Smooth transitions: When installing a backsplash behind a stove, it is essential to create smooth transitions between different surfaces and finishes. This can be achieved through using bullnose edges on tiles or adding trim/metal edging along edges.
- Tile layout: Careful planning of tile layouts can result in seamless designs around stoves. Consider aligning with range hood edges or cabinetry and using border or trim tiles for irregular shapes.
Materials for Backsplash
The most suitable materials for a backsplash behind a stove are those that serve both practical and aesthetic purposes. Among the top choices are ceramic tiles, subway tiles, glass tiles, stainless steel, brick, natural stone, and wallpaper.
Ceramic tiles are an enduring and sturdy option available in a variety of colors, shapes, and designs. They are effortless to clean and can withstand heat and moisture.
Subway tiles are a timeless and versatile choice that can create a sleek and modern appearance. They come in various sizes and finishes, allowing for endless design possibilities.
Glass tiles are a shiny and vibrant alternative that can reflect light, adding brightness to the space. They are also resistant to moisture and low-maintenance.
Stainless steel is a sophisticated and industrial material that can resist heat and stains. It is also easy to clean and can create a cohesive look when paired with other stainless steel appliances.
Brick is a rustic and warm element that can add texture and personality to your kitchen. It is also heat-resistant and effortless to clean.
Natural stone is a luxurious and elegant option that can showcase the beauty and diversity of nature. It comes in different types such as marble, granite, and travertine.
Wallpaper is an imaginative and cost-effective solution that offers endless design possibilities. It is also easy to install and can be replaced effortlessly for a fresh look.
Design Options for Backsplash
There are various design possibilities for a backsplash behind the stove, each boasting its own unique flair and advantages. These alternatives include tile backsplashes, ceramic tile backsplashes, marble tile backsplashes, pearl and shell tile backsplashes, and stainless steel backsplashes.
Tile backsplashes are a popular choice due to their versatility in color, pattern, and shape. This option can serve as an accent wall to infuse your kitchen with a burst of color or texture. Another frequently chosen option is the ceramic tile backsplash, which offers durability and can effortlessly match any kitchen style.
For those seeking to add a touch of opulence to their kitchen, marble tile backsplashes are an excellent option. The natural veining and texture of marble can add an air of elegance and sophistication to the space. On the other hand, for a coastal or beachy vibe, pearl and shell tile backsplashes can create a shimmering and organic look with their iridescent materials.
If you prefer a more contemporary and polished design, stainless steel backsplashes may be the perfect choice for you. Not only does it provide a shiny and reflective surface, but it is also easy to clean and maintain.
To better visualize the distinctions between these different design options, please refer to the table below:
| Design Option | Benefits | Style |
| Tile backsplash | Offers versatility in color, pattern, and shape; can be used as an accent wall | Varies based on selected tiles |
| Ceramic tile backsplash | Durable; complements any kitchen style | Classic and timeless |
| Marble tile backsplash | A touch of luxury and sophistication; adds texture | Elegant and high-end |
| Pearl and shell tile backsplash | Creates a shimmering and organic effect; perfect for a coastal vibe | Natural and beachy |
| Stainless steel backsplash | Sleek, contemporary, and easy to clean | Modern and polished |
When selecting a design option for your stove’s backsplash, consider the overall style of your kitchen as well as your personal preferences.
Installation Process
A backsplash installation behind a stove is an excellent way to incorporate style and functionality into your kitchen. Below are the necessary steps for this process:
- Preparation: Before beginning, clear your countertop of all appliances and cookware, and move the stove slightly away from the wall to allow for easy tile placement. To protect your countertop, cover it with a drop cloth or layer of cardboard.
- Power down: It is crucial to turn off power to any nearby electrical outlets or light switches before starting the tiling process. This can be done by switching off the circuit breaker for the kitchen or using the specific switch for outlets and switches.
- Cuts: Determine where cuts will need to be made on wall tiles before starting the installation process to ensure a smooth and precise installation.
- Remove obstructions: Take off covers for outlet and light switches, as well as any other objects in the way such as shelves or racks.
- Protect outlets and switches: To prevent any damage during installation, use duct tape to cover the edges of the backsplash and any exposed outlets or switches.
- Clean the wall: Thoroughly clean the wall where the backsplash will be installed to ensure proper adhesion of tiles.
Apply mortar: Using a tile trowel, apply thinset mortar in small sections on the backsplash wall.
- Begin tiling: Start placing tiles on the wall, beginning at the bottom and working your way up. Use spacers between each tile for even spacing.
- Cut tiles if needed: For edges or corners, it may be necessary to cut tiles for a proper fit. A tile cutter or wet saw can be used for precise cuts.
- Let dry and grout: Once all tiles are in place, follow manufacturer’s instructions for drying time before applying grout between each tile with a grout float.
- Clean and seal: After the grout has dried, use a damp sponge to clean the tiles and then seal them to protect against stains and moisture.
- Reattach outlets and switches: Once the sealant has dried, reattach outlet and light switch covers and turn the power back on.
Maintenance and Cleaning
Regular cleaning and maintenance of your stove’s backsplash is crucial to keep it in top condition. Depending on usage, it should be cleaned at least once a week for light use and every other week for heavy use.
However, for optimal results, it is recommended to wipe down the backsplash after each cooking session to prevent grease and grime buildup. Follow these simple steps to effectively clean your backsplash:
Step 1: Gather Your Supplies
Before beginning the cleaning process, make sure you have all the necessary supplies, including an all-purpose cleaner or degreaser, scrub brushes, microfiber cloths, baking soda, vinegar, and an orange-oil based degreaser (if needed).
Step 2: Prepare the Area
Clear any items from the countertops in front of the backsplash and cover them with a protective cloth or plastic sheet to prevent any damage or spills.
Step 3: Remove Grease and Grime
Spray the all-purpose cleaner or degreaser onto the backsplash and use a scrub brush to remove any stubborn grease and grime. For tougher buildup, let the cleaner sit for a few minutes before scrubbing.
Step 4: Wipe Down with a Microfiber Cloth
Use a clean microfiber cloth to wipe down the backsplash, ensuring that all cleaner and residue is removed.
Step 5: Rinse with Water
Wet another microfiber cloth with water and use it to rinse off any remaining cleaner.
Step 6: Dry the Area
Use a dry microfiber cloth to dry the backsplash and remove any water spots.
Step 7: Clean Grout Lines
To clean grout lines between tiles, mix equal parts of baking soda and water to create a paste. Use a grout brush to apply the paste onto the grout lines and let it sit for a few minutes before scrubbing. Rinse with water and dry with a microfiber cloth.
Step 8: Remove Tough Stains
For tough stains, use an orange-oil based degreaser and follow the instructions on the product for best results. This can be used on both grout lines and tile surfaces.
Step 9: Wipe Down with Vinegar
For daily maintenance, mix equal parts of vinegar and water in a spray bottle and use it to wipe down the backsplash after cooking. This will help prevent buildup of grease and grime.
Step 10: Rinse with Water
Wet a microfiber cloth with water and use it to rinse off any remaining vinegar solution.
Step 11: Dry the Area
Use a dry microfiber cloth to dry the backsplash and remove any water spots.
Step 12: Seal the Backsplash
After thorough cleaning, consider sealing your backsplash every 1-2 years to provide extra protection against stains and make future cleanings easier.
Conclusion
Ultimately, a backsplash behind your stove serves both practical and aesthetic purposes in your kitchen.
It not only protects your walls from grease and food splatters but also adds a touch of personality and visual interest to the space. However, with so many options available, it can be challenging to decide where exactly to stop the backsplash behind your stove.
So, let’s dive into the details of determining the perfect height for your backsplash and explore different materials and design options that will make your cooking space stand out.