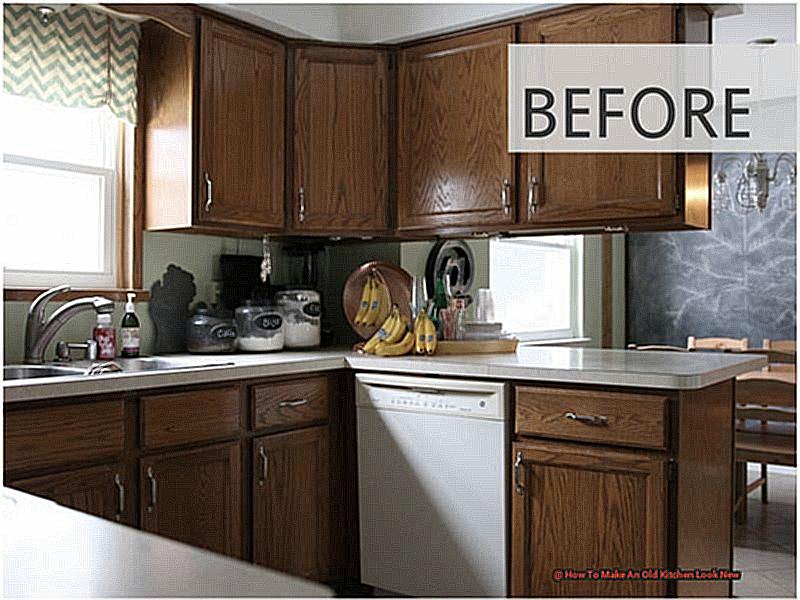
Are you stuck in a time warp every time you step into your kitchen? Are you longing for a space that is both functional and stylish, but feel overwhelmed by the thought of a full renovation? Well, fear not. With a few simple changes, you can transform your outdated kitchen into a modern oasis. Say goodbye to dull cabinets and hello to sleek design – it’s time to give your kitchen the upgrade it deserves.
But why is it important to update an old kitchen? For starters, it can increase the value of your home and make cooking and entertaining more enjoyable. Plus, who doesn’t want to cook in a space that reflects their personal style?
Don’t worry about breaking the bank – there are plenty of budget-friendly ways to give your kitchen a modern makeover. From DIY projects to strategic upgrades, we’ll show you how to get the most bang for your buck.
One of the key elements in creating a modern look is choosing the perfect color scheme. We’ll guide you through the latest trends and help you find the right palette for your space. And don’t worry if you have a small kitchen – we’ve got some creative storage solutions that will make the most out of every inch.
Of course, no modern kitchen is complete without must-have appliances. We’ll introduce you to some innovative gadgets that will not only make cooking easier but also add a touch of style to your space.
So put on your apron and get ready for a journey through all things kitchen transformation. By the end of this blog post, you’ll be well on your way to saying goodbye to an old-fashioned kitchen and hello to your dream culinary haven. Let’s dive in.
Contents
- 1 How can I update my kitchen cabinets without replacing them?
- 2 Paint Kitchen Cabinets
- 3 Reface Kitchen Cabinets
- 4 Install a Pull-Out Cabinet Shelf
- 5 Put in Undercabinet Lighting
- 6 Build a Butcher Block Island
- 7 Build a Sideboard
- 8 Build a Window Seat
- 9 Add a Plate Rack
- 10 Add Cabinet Crown Molding
- 11 Add Storage With More Kitchen Cabinets
- 12 Conclusion
How can I update my kitchen cabinets without replacing them?
There are numerous inexpensive methods to rejuvenate the appearance of outdated kitchen cabinets without the need for a complete replacement.
These methods involve decluttering and cleaning, painting or staining, updating hardware and knobs, incorporating molding or trim, implementing new shelves or organizers, utilizing contact paper or wallpaper, refacing cabinet doors, creating DIY open shelving, installing under-cabinet lighting, and opting for furniture-like alternatives.
Paint Kitchen Cabinets
Upgrade your outdated kitchen cabinets into a fresh and stylish space without breaking the bank by following these steps for painting them:
- Evaluate the cabinet’s condition: Before starting, assess the current state of your cabinets. Are they in good enough condition to be painted, or do they require more extensive repairs?
- Empty the cabinets and remove the doors: Take out all items from your cabinets and remove the doors and hardware. This will make it easier to paint and ensure a smoother finish.
- Clean surfaces and fix damages: Thoroughly clean all surfaces with a degreaser to eliminate any built-up grime. Fix any damages, such as dents or scratches, with wood filler.
- Prepare the area and sand: Lay down drop cloths to protect your floors and countertops. Gently sand all surfaces to create a smooth base for the paint to adhere to.
- Vacuum the area: After sanding, make sure to vacuum up any dust or debris before moving on to the next step.
- Prime the cabinets: Use a high-quality primer to prepare your cabinets for painting. This will help the paint adhere better and prevent any stains or wood tannins from bleeding through.
- Sand the cabinets: After priming, lightly sand the cabinets again to smooth out any imperfections caused by the primer.
- Paint the cabinets: Finally, it’s time to paint. Use a high-quality paint specifically designed for kitchen cabinets. Apply at least two coats of paint, allowing each coat to dry completely before applying the next one.
- Reinstall doors and hardware: Once the paint has dried completely, reattach the doors and hardware to your cabinets.
- 10. Optional: Add a protective topcoat: For extra durability, consider adding a clear topcoat to protect your newly painted cabinets from wear and tear.
| Step | Description | Helpful Tip |
| 1 | Assess the cabinet’s condition | Consider hiring a professional for extensive repairs or if the cabinets are in poor condition. |
| 2 | Empty the cabinets and remove the doors | Label each door and its corresponding cabinet to make reinstallation easier. |
| 3 | Clean surfaces and repair damages | A clean surface will ensure better adhesion of the paint. |
| 4 | Prepare the area and sand | Sand in the direction of the wood grain for optimal results. |
| 5 | Vacuum the area |
Reface Kitchen Cabinets
Reviving and refreshing the look of your kitchen cabinets can be a costly endeavor, but there is a more budget-friendly alternative: refacing them. Refacing involves updating the outer appearance of the cabinets while keeping the inner cabinet boxes intact. There are numerous cost-effective and efficient ways to reface your kitchen cabinets, including:
- Painting: A fresh coat of paint can work wonders for outdated cabinets. This option is budget-friendly and offers a wide range of color choices. To achieve optimal results, ensure you thoroughly clean and sand the surfaces before painting and use high-quality paint products specially designed for cabinets.
- Refinishing: Refinishing involves stripping off the old finish from the cabinet doors and drawers, sanding them down, and then applying a new stain or paint. This option takes more time than painting but can provide a more natural wood look to your cabinets.
- Refacing Kits: Ready-to-use refacing kits are available for purchase, which include pre-cut veneers, adhesive, and instructions. These kits are easy to install and offer a variety of styles and finishes to choose from.
- Replacing Cabinet Doors: Simply replacing the cabinet doors with new ones that match your desired style is another option. This method may be more expensive than others, but it allows for a completely new look without having to change the entire cabinet structure.
- Updating Hardware: Swapping out old cabinet knobs and handles for new ones can also give your cabinets a refreshed look. This is an effortless and cost-effective way to update the style of your kitchen.
By following these methods, you can easily reface your kitchen cabinets without breaking the bank.
Install a Pull-Out Cabinet Shelf
Revamping an outdated kitchen can be easily achieved by installing pull-out cabinet shelves. Not only do these shelves offer extra storage space, but they also enhance the functionality and organization of your cabinets. With pull-out shelves, accessing items at the back of your cabinets becomes effortless, eliminating the need to reach and rummage through everything in front. This not only saves time but also streamlines the cooking and meal prep process.
Additionally, the modern and sleek look of pull-out cabinet shelves adds a touch of sophistication to any kitchen. Say goodbye to bulky and outdated wire or wooden shelving, and welcome a more contemporary and streamlined appearance. This simple upgrade can give your kitchen an instant refresh.
Moreover, installing pull-out cabinet shelves can increase the value of your home. Potential buyers will appreciate the convenience and modern touch of pull-out shelves in the kitchen, making it a valuable selling point.
The following table highlights the various benefits of installing pull-out cabinet shelves:
| Benefits | Explanation |
| Additional Storage Space | Pull-out shelves provide extra storage space within cabinets. |
| Enhanced Functionality | Easier access to items at the back of cabinets. |
| Improved Organization | Organized storage streamlines cooking and meal prep processes. |
| Contemporary Look | Pull-out shelves add a modern and sophisticated touch to the kitchen. |
| Increase in Home Value | Potential buyers will appreciate this convenient and modern feature. |
So, installing pull-out cabinet shelves is a simple and cost-effective solution for updating an old kitchen and increasing the value of your home.
Put in Undercabinet Lighting
Undercabinet lighting has the ability to greatly enhance the visual appeal of an outdated kitchen, giving it a more contemporary and sophisticated appearance. It offers additional lighting for tasks, making cooking, meal preparation, and other kitchen activities much easier to see. It also adds a touch of ambiance and can accentuate the design elements of your kitchen, such as the backsplash or countertop materials. By incorporating undercabinet lighting, you can create a more inviting and aesthetically pleasing space.
The function of undercabinet lighting is to illuminate countertops and workspaces under the cabinets, providing better visibility and reducing shadows. This makes it easier to perform tasks in the kitchen, making it a more functional area. It also helps create a warm and welcoming atmosphere in the kitchen, making it a more enjoyable place to spend time in.
There is a variety of options when it comes to undercabinet lighting, including LED lights, fluorescent lights, and xenon lights. LED lights are the most energy-efficient choice and have a longer lifespan of up to 50,000 hours, making them a cost-effective option in the long run. They also come in different color temperatures, allowing you to customize the lighting to your desired effect.
To achieve the best results, it is important to select the right type of fixture for your undercabinet lighting. Linear lighting provides uniform light distribution, while puck fixtures offer more focused light. You can also choose between hardwiring the lights, plugging them into an outlet, or using battery-powered options depending on your preferences.
In addition, undercabinet lighting can be controlled by a dimmer switch, allowing you to adjust the brightness and create different moods in your kitchen. This not only adds to the overall ambiance but also helps save energy by using less light when needed.
Overall, undercabinet lighting is a simple and cost-effective way to give an outdated kitchen a modern and stylish look. It not only adds functionality but also enhances the aesthetic appeal of the space, making it a more inviting and enjoyable place to cook and spend time in.
Build a Butcher Block Island
Constructing a butcher block island for a kitchen remodel requires specific materials and tools, including a butcher-block countertop, gas pipe sections, casters, screws, and mineral oil. Prior to commencing the project, it is vital to have all necessary materials and tools prepared to ensure a seamless and efficient construction process.
Cutting the Countertop:
Using a saw and straightedge guide, cut the countertop according to the marked lines.
Assembly Procedure:
- Lay out all pieces according to the dimensional drawings provided in the instructions.
- Assemble the ladder rung by using tee fittings and a horizontal center tee with vertical side tees.
- Assemble the base rung using flanges and fittings, adjusting lengths as needed.
- Repeat step 3 for the second stage of vertical pieces.
- Lay out the pieces for the towel-bar side, ensuring that the horizontal tee fittings are aligned with the ladder side.
- Secure the towel-bar side onto the stretcher pipe on the ladder side and rotate until properly aligned.
- Cut two boards to create shelf notches and glue them together from underneath with screws every 10 inches around the perimeter.
- Assemble the island in the kitchen by securing the frame to the lower butcher-block counter with screws through flange holes, then attach the upper counter with screws through flanges underneath it.
- Drill pilot holes in casters and secure them to the bottom of the island with screws.
- Apply mineral oil to both the counter top and shelf.
Day-to-day Timeline:
- Measure and mark the countertop for cut lines.
- Use a saw and straightedge to make cuts.
- Sand edges with sandpaper.
- Lay out all pieces according to drawings.
- Assemble the ladder rung using tee fittings.
- Assemble the base rung using flanges and fittings.
- Adjust lengths as needed by tightening or loosening pieces.
- Repeat steps 5-7 for the second stage of vertical pieces.
- Lay out the pieces for the towel-bar side and repeat step 8.
- Ensure that the horizontal tee fittings on both sides are aligned for a level stretcher and shelf.
- Thread the stretcher pipe into the tee fitting on the ladder side.
- Lay the ladder side flat, secure the towel-bar side onto the stretcher pipe, rotate until aligned, then screw together.
- Cut two boards to create shelf notches and glue them together from underneath with screws every 10 inches around the perimeter.
- Assemble the island in the kitchen by securing the frame to the lower butcher-block counter with screws through flange holes, then attach the upper counter with screws through flanges underneath it.
- Drill pilot holes in casters and secure them to the bottom of the island with screws.
- Apply mineral oil to both the countertop and shelf.
Build a Sideboard
Building a unique sideboard can greatly enhance the appearance of an outdated kitchen by adding both style and functionality. Not only does it provide additional storage space, but it also serves as a focal point of the room.
With a wide array of DIY sideboard plans to choose from, you can select one that complements the aesthetics of your home and meets your storage needs.
Here are some ways in which constructing a sideboard can elevate the look of an old kitchen:
Offers Extra Storage Capacity:
A typical sideboard includes multiple compartments such as open shelves, drawers, and cabinets, making it a valuable addition to an outdated kitchen with limited storage options. It can be used to store extra dishes, utensils, cookware, or even food items.
Adds a Decorative Element:
Sideboards come in various styles and designs that can add a decorative touch to an old kitchen. You can choose from rustic, modern, retro, or farmhouse designs to complement the theme of your home. Furthermore, sideboards often feature large countertops that make for great display areas for decor pieces or small appliances.
Renovates Old Furniture Pieces:
If you have an outdated or worn-out furniture piece in your kitchen, you can repurpose it into a stylish sideboard using some DIY techniques. This allows you to save money while giving new life to your old furniture and enhancing the appearance of your kitchen.
Hides Away Clutter:
With its multiple compartments and storage options, a sideboard can effectively conceal clutter in an old kitchen. You can use it to store items that typically clutter up your counters or cabinets, making your kitchen look more organized and tidy.
Table: Examples of Unique DIY Sideboard Plans for an Outdated Kitchen
| Design | Material | Storage Options |
| Elegant | Reclaimed Wood | Open shelves, cabinet doors with glass panels |
| Industrial | Metal and Concrete | Drawers, cabinet doors with steel mesh inserts |
| Cozy | Bamboo and Wicker | Open shelves, cabinet doors with woven cane inserts |
| Fancy |
Creating a sideboard for your kitchen is a great way to give an outdated space a much-needed makeover. Not only does it add a touch of style and functionality, but it also serves as a new focal point in the room.
With an abundance of DIY sideboard plans available, you can select one that complements your home’s aesthetics and fulfills your storage needs.
Build a Window Seat
Building a window seat in your outdated kitchen is a fantastic way to infuse it with a touch of charm and functionality, giving it a new and improved appearance. Discover the various ways building a window seat can transform your old kitchen into a modern and inviting space:
- Extra Seating: A window seat offers additional seating for family and guests, making your kitchen a more welcoming and comfortable area.
- Optimal Storage: Utilizing kitchen wall cabinets as the base for your window seat allows you to maximize storage space for dishes, cookware, and other essential kitchen items.
- Unique Character: A window seat can bring personality and charm to an otherwise lackluster kitchen. You can customize the design and materials to suit your personal style and add a one-of-a-kind element to the space.
- Eye-Catching Focal Point: A well-crafted and styled window seat can become the focal point of your kitchen, drawing attention away from any outdated features.
- Natural Light: Placing a window seat beneath a window allows natural light to pour into your kitchen, creating the illusion of a brighter and more spacious environment.
- Cozy Atmosphere: A window seat provides a cozy nook for reading, relaxing, or sipping on coffee while enjoying the view outside. This adds warmth and comfort to your kitchen.
- Versatile Functionality: In addition to seating and storage, a window seat can also serve as a mini-office or homework area, making it a versatile addition to your kitchen.
By constructing a window seat in your outmoded kitchen, you not only gain practical benefits but also elevate the overall look and feel of the space.
Add a Plate Rack
Revamping an old kitchen can be made simple and effective by adding a plate rack. This small addition not only brings charm and character to the space, but also provides practical benefits such as organization and convenience.
Primarily, incorporating a plate rack can enhance the overall aesthetic of your kitchen. By displaying your dishes and adding visual interest to the walls, it can give the space a more spacious and airy feel. This can be especially useful for updating an outdated kitchen into a modern and inviting space.
Furthermore, a plate rack can help declutter your kitchen countertops. By having dishes easily accessible on the wall, you can free up valuable counter space for other tasks such as food preparation. This creates a more organized and functional cooking environment.
In terms of functionality, a plate rack adds versatility to your kitchen. It allows for easy access to frequently used dishes while cooking or entertaining, making meal prep and serving more efficient. Additionally, it can also be used to display decorative items or plants, adding a personal touch to the space.
Apart from its practical benefits, a plate rack also offers customizable design options. With various materials, sizes, and styles to choose from, you can easily match it with your existing kitchen decor. This allows you to create a unique look that reflects your personal taste and preferences.
In conclusion, adding a plate rack to an old kitchen is an affordable and effortless way to update its overall look. It not only brings charm and functionality but also offers customizable design options for a personalized touch.
Add Cabinet Crown Molding
To enhance the aesthetic of your outdated kitchen, consider adding cabinet crown molding. This simple addition can bring a touch of charm and character to your space. To complete this project, you will need the following materials and tools:
| Materials | Tools |
| Crown molding | Miter saw |
| Measuring tape | Nail gun |
| Pencil | |
| Wood glue | |
| Finish nails | |
| Sandpaper | |
| Backing wood strips (× or /-in x -/-in) |
The first step in adding cabinet crown molding is to measure the length of your cabinets using a measuring tape. Next, cut the crown molding to fit each cabinet using a miter saw. Be sure to sand down any rough edges on the crown molding for a smooth finish. Once the pieces are cut and sanded, apply wood glue to the back of each piece.
Carefully place the crown molding on top of the cabinets, ensuring it is centered and straight. To secure the molding in place, use a nail gun to drive finish nails into backing wood strips. Repeat this process for each cabinet top.
After all the crown molding pieces are attached, use sandpaper to smooth out any rough or uneven areas. For added beauty, consider painting or staining the crown molding to match your kitchen’s existing style.
Add Storage With More Kitchen Cabinets
The addition of extra kitchen cabinets can significantly enhance the appearance and functionality of an outdated kitchen. This is because cabinets not only serve as storage solutions but also play a crucial role in the overall aesthetic of a kitchen. By incorporating additional cabinets into your kitchen design, you can achieve a more cohesive and modern look. Here are some ways in which the addition of more kitchen cabinets can revamp an old kitchen:
- Increased Storage Capacity: One of the main advantages of adding more kitchen cabinets is the increase in storage space. This is especially beneficial for older kitchens where storage may be limited. With more cabinets, you can declutter your countertops and create a more organized and spacious kitchen.
- Aesthetic Upgrade: Outdated or worn-out cabinets are common in older kitchens, which can bring down the overall appearance of the space. By adding new cabinets, you can instantly give your kitchen a visual upgrade. Opt for cabinets with contemporary designs and finishes to achieve a fresh and updated look.
- Customization: Another benefit of adding more cabinets is the ability to customize them according to your specific needs and style preferences. You can choose the size, design, and finish of your cabinets to match the overall aesthetic of your kitchen.
- Concealment of Appliances: In older kitchens, appliances may stand out as an eyesore due to their outdated appearance. By adding more cabinets, you can strategically hide these appliances behind cabinet panels, creating a sleek and seamless look.
- Blend Modern and Traditional Elements: Mixing traditional and contemporary elements in kitchen design has become a trend for a unique and eclectic look. By adding more cabinets with modern designs and finishes to an old kitchen, you can achieve this combination of styles seamlessly.
By expanding your kitchen cabinet storage, you not only increase functionality but also elevate the overall aesthetic of your outdated kitchen.
Conclusion
In conclusion, revitalizing an outdated kitchen doesn’t have to be a daunting and costly endeavor.
By implementing a few simple changes, you can effortlessly transform your space into a modern oasis that reflects your unique style.
From painting or refacing cabinets to installing undercabinet lighting and crafting custom furniture pieces like a butcher block island or sideboard, there are plenty of budget-friendly options for giving your kitchen the upgrade it deserves.